> For the complete documentation index, see [llms.txt](https://docs.aigent.run/llms.txt). Markdown versions of documentation pages are available by appending `.md` to page URLs; this page is available as [Markdown](https://docs.aigent.run/ai-agent-terminal/social-agents/discord-agent-integration-walkthrough.md).
# Discord Agent Integration Walkthrough
## Create a Discord Application
1. Go to [Discord Developer Portal](https://discord.com/developers/applications)
2. Click "New Application" and give your application a name
## Configure Discord Bot
1. Click on Bot.
2. Set a username and a nice unique icon for your bot.
3. Toggle "Public Bot" off (if you don't want others to invite it).
4. Enable "Message Content Intent" (for reading messages).
5. Copy the Token (click "Reset Token" if needed, then store it safely).
## Invite the Bot to your Server
1. Go to the **OAuth2** tab → OAuth2 URL Generator
2. Under OAuth2 URL Generator, check bot
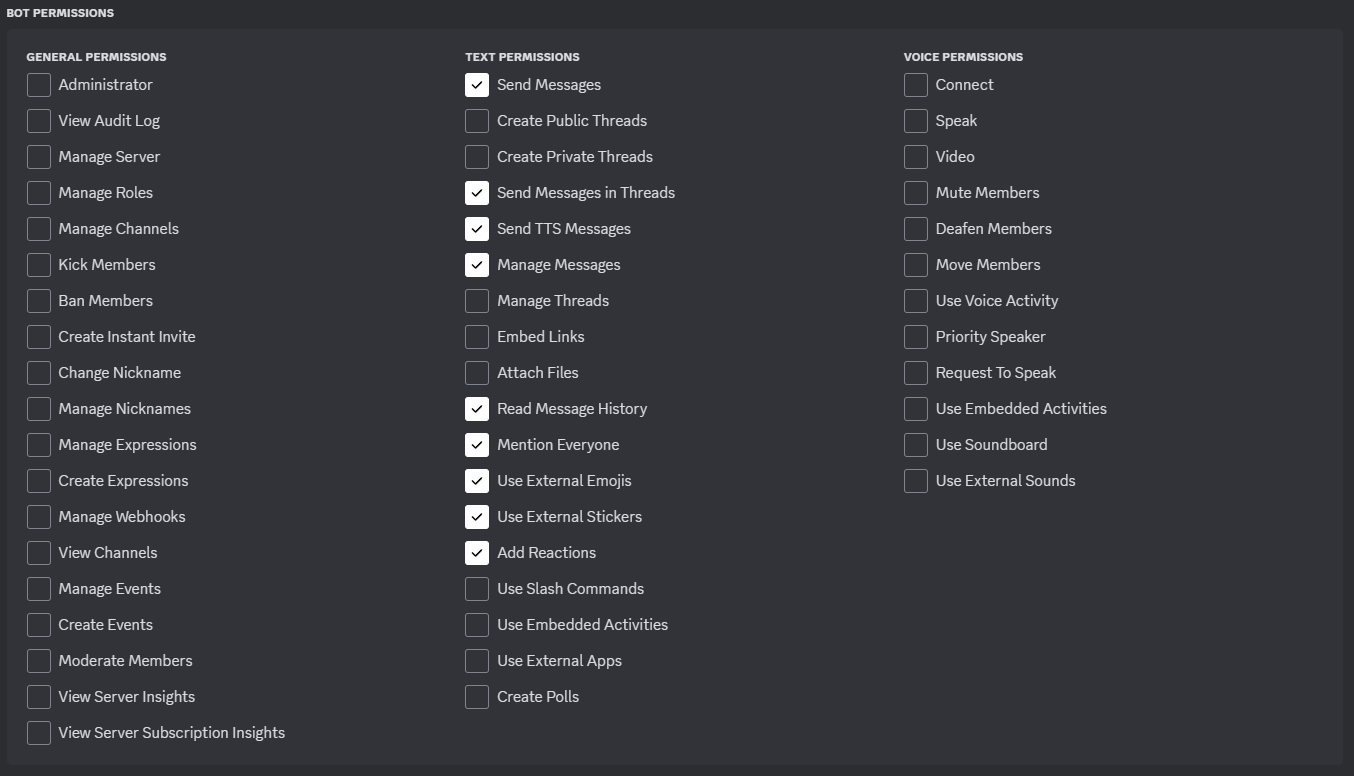
3. Under Bot Permissions, check the appropriate text permissions you want. See screenshot fo recommended permissions
4. Keep integration type to Guild Install
5. Copy the generated URL and paste it on your browser to add the bot to your server
6. Authorize your bot on your server
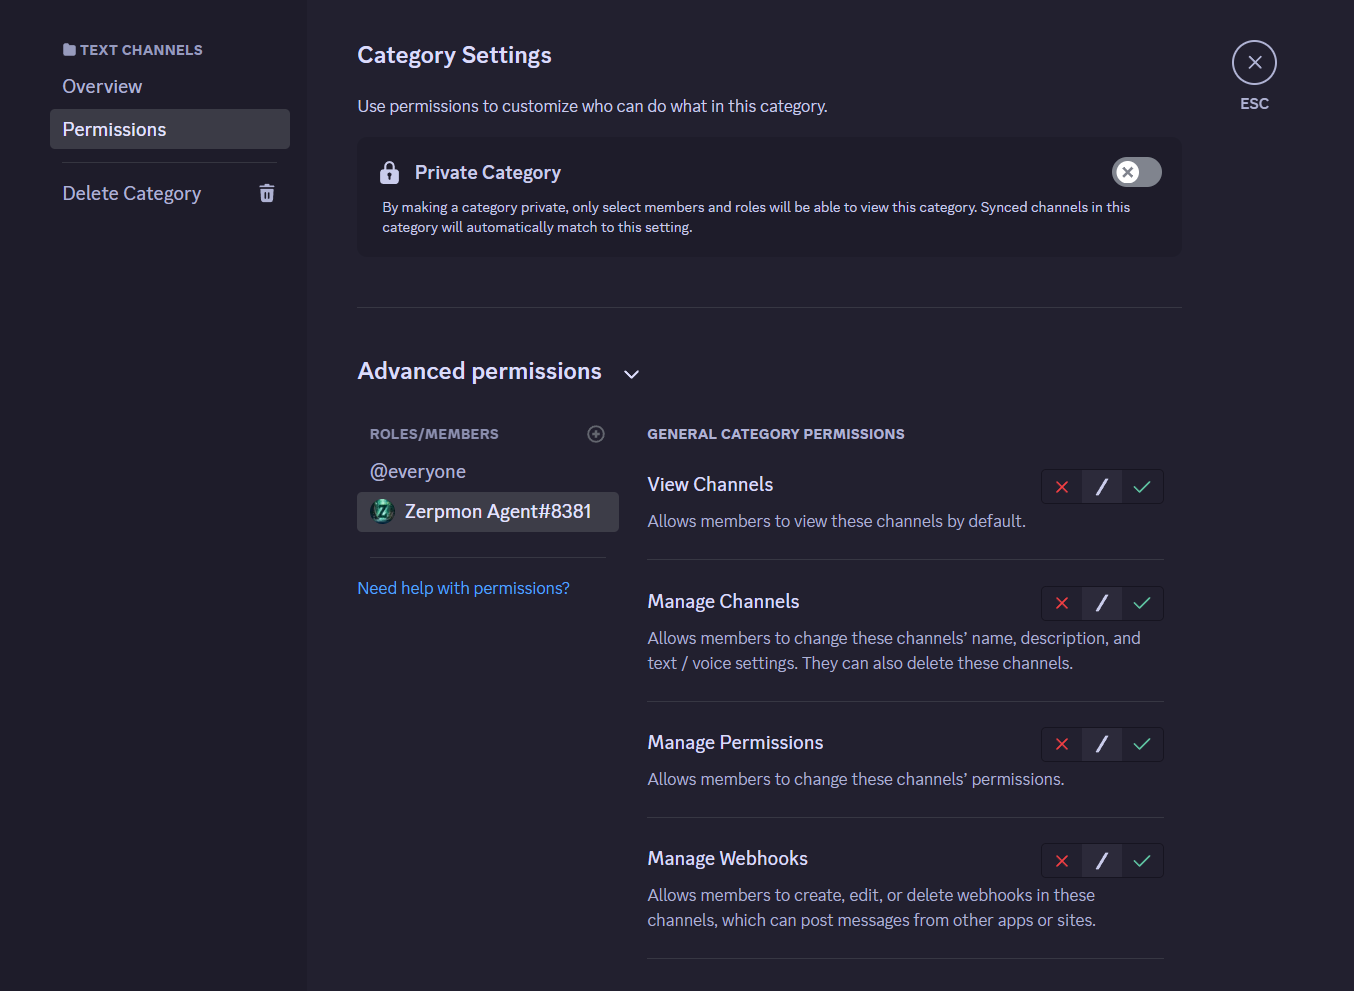
7. Make sure you give your bot permissions on the channels you want it to interact with
## Configure Discord Agent in aigentOS
1. Go to your agent's configuration page. Under aigentOS, click the Discord Tab. Configure accordingly and click Save Agent Settings button
2. And then click the Settings Tab
3. Paste your Bot Token in the Discord Bot Token text box
4. Add channel IDs you want your Discord agent to interact with. You can copy the channel id by right-clicking the channel in Discord and clicking Copy Channel ID from the context menu. And then paste the channel id in the textbox and click Add.
5. Click the "Send Test Message" button in to verify that you have the correct channel ID. Remember that the Discord bot you created needs to have the correct permission in the channel you added.